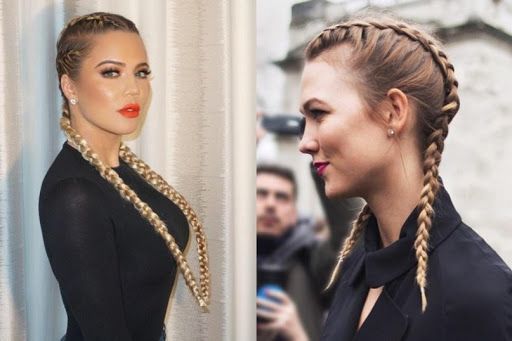
speckledtroutrodeo.com – The Dutch braid, also known as the inverted French braid, is a captivating variation on the classic braiding technique that has been a staple in hairstyling for centuries. This unique style stands out for its distinctive appearance and the skill it takes to create it. Unlike the French braid, where the hair is crossed over the top, the Dutch braid involves crossing the hair under, creating a braid that pops out rather than lying flat against the head. This effect gives the illusion of more volume and a bolder look, making it a favorite among fashion-forward individuals and those looking to add a touch of elegance to their everyday hairstyle.
Origins of the Dutch Braid
The Dutch braid has a rich history that is often intertwined with the French braid, with both styles being adaptations of the traditional three-strand braid. The technique has been used across various cultures and time periods, each adding their own unique twist to the style. While the exact origins are difficult to pinpoint, the Dutch braid has been a prominent feature in European hairstyling, particularly in the Netherlands, hence the name.
Technique and Execution
Creating a Dutch braid requires a bit of practice and precision. The process begins by dividing the hair into three sections. Instead of crossing the strands over each other as in a French braid, the Dutch braid involves crossing them under. As you progress, you add hair to each section from the sides of the head, just as you would with a French braid, but always crossing under to maintain the distinctive raised appearance.
The technique can be broken down into the following steps:
- Divide the hair: Start by separating the hair at the crown into three equal sections.
- Cross under: Take the right section and cross it under the middle section. Then, take the left section and cross it under the new middle section.
- Add hair: As you continue to cross the strands under, incorporate new hair from the sides of the head into each section to create the full, integrated look.
- Secure the braid: Once you reach the nape of the neck or the desired length, continue braiding without adding more hair until you reach the end. Secure with an elastic band.
Versatility and Styling
One of the most appealing aspects of the Dutch braid is its versatility. It can be styled in various ways to suit different occasions and personal tastes. Whether you prefer a single braid down the back, two braids on either side for a playful look, or a halo braid encircling the head for a more sophisticated style, the Dutch braid offers endless possibilities.
For a casual look, a messy Dutch braid with loose strands framing the face can add a touch of effortless chic. For more formal events, a sleek and tight Dutch braid can serve as an elegant updo. Accessories such as ribbons, beads, or flowers can also be incorporated into the braid to add a personalized touch.
Maintenance and Care
Maintaining a Dutch braid is relatively simple. To keep the style looking fresh, avoid touching the braid too much to prevent frizz and loosening of the strands. If you plan to wear the braid for an extended period, ensure that your hair is clean and free of tangles before starting. When it’s time to take the braid out, gently undo it from the bottom to avoid unnecessary stress on the hair.
Conclusion
The Dutch braid is more than just a hairstyle; it’s a testament to the creativity and artistry involved in traditional braiding techniques. Its unique structure and the skill required to create it make it a standout choice for those looking to elevate their hairstyle game. Whether you’re a seasoned braider or a beginner, the Dutch braid offers a rewarding challenge and a beautiful result that’s sure to turn heads.